What you’ll learn
This guide walks you through setting up minimum quantity requirements on your Shopify store from scratch. By the end, you’ll have working rules that enforce minimums at checkout — no code required.
- How to install and configure Nex MOQ on your Shopify store
- Creating minimum quantity rules for products, collections, and the entire cart
- How checkout validation blocks orders that don’t meet your requirements
- Customizing the error messages your customers see
Step 1: Install Nex MOQ
- 1
Find the app — search “Nex MOQ” in the Shopify App Store, or go directly to the app listing.
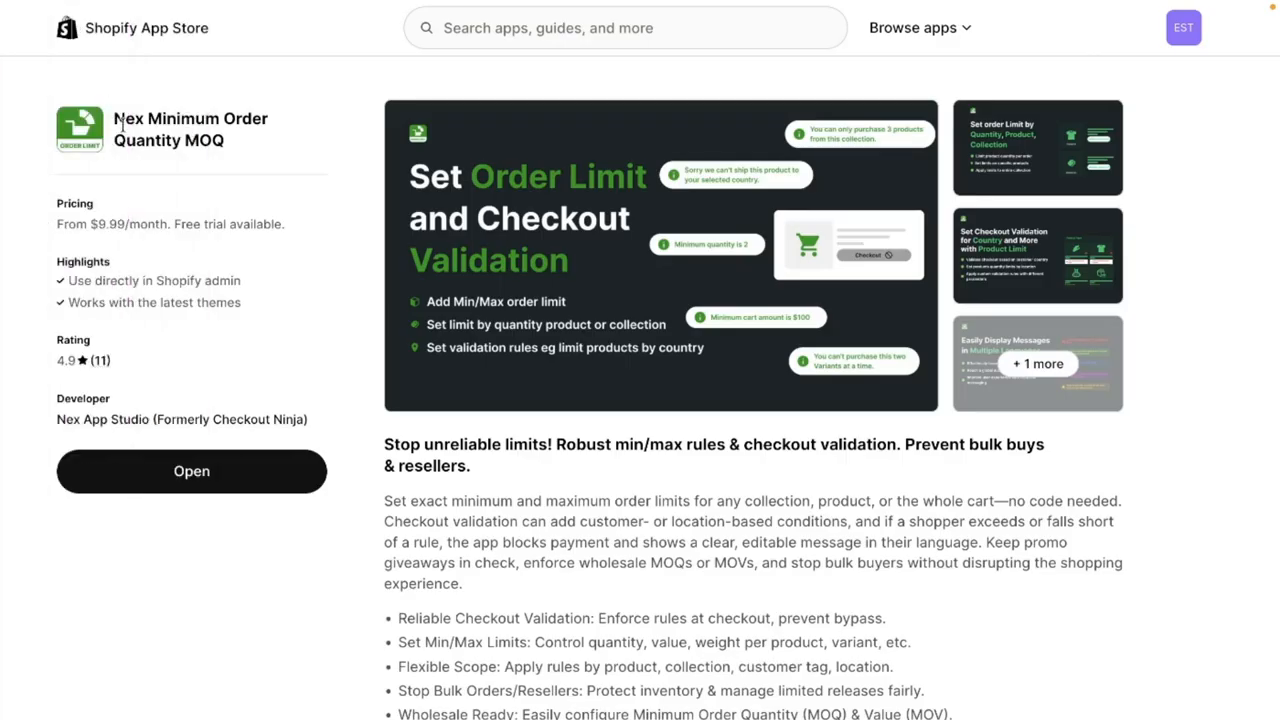
- 2
Click “Add app” and approve the permissions. The app needs access to your products and checkout to enforce rules.
- 3
Open the app from your Shopify admin sidebar. You’ll see the main dashboard where all your rules are managed.
Step 2: Create your first minimum quantity rule
- 1
Click “Create Rule” from the dashboard.
- 2
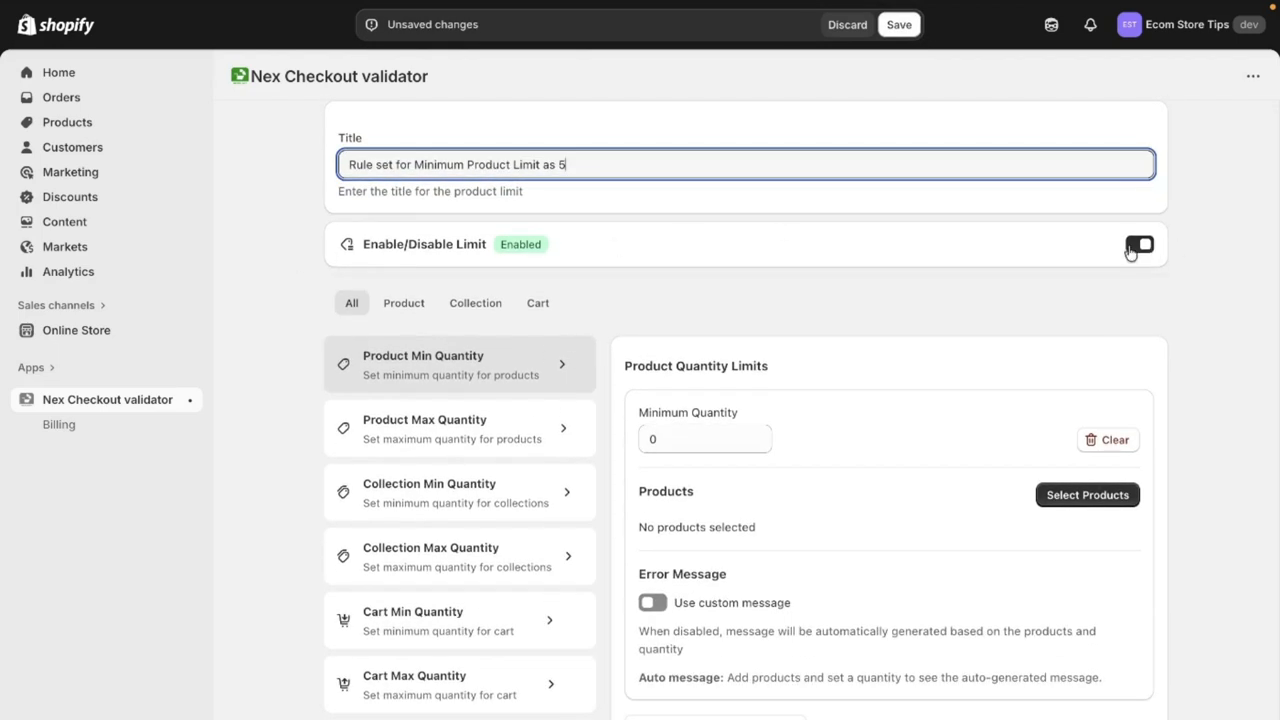
Choose the rule type — select “Minimum Quantity” to set a minimum number of items customers must order.
- 3
Set the scope — pick what this rule applies to:
- • Specific products — enforce minimums on individual items (e.g., “buy at least 6 of this t-shirt”)
- • Collections — require a minimum across an entire collection (e.g., “order at least 12 items from Wholesale”)
- • Entire cart — set a store-wide minimum (e.g., “your cart must have at least 3 items”)
- 4
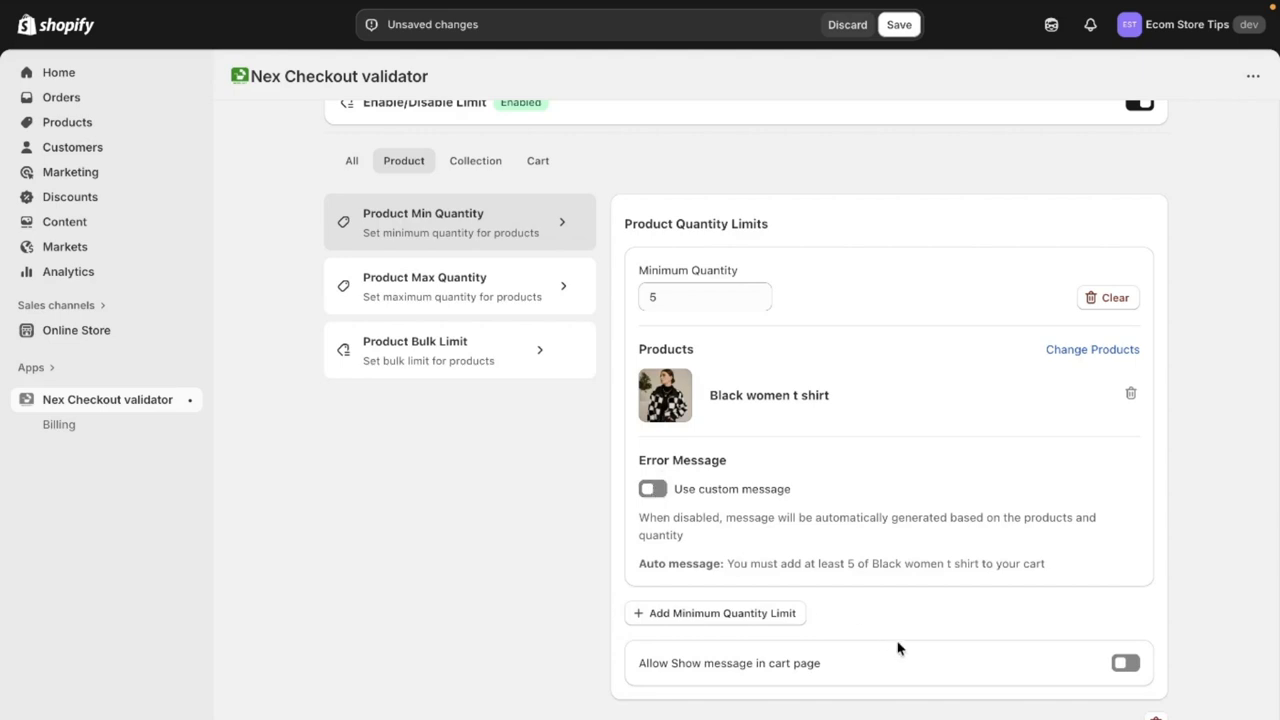
Enter the minimum value — type the number of items required. For example, enter “5” to require at least 5 units.
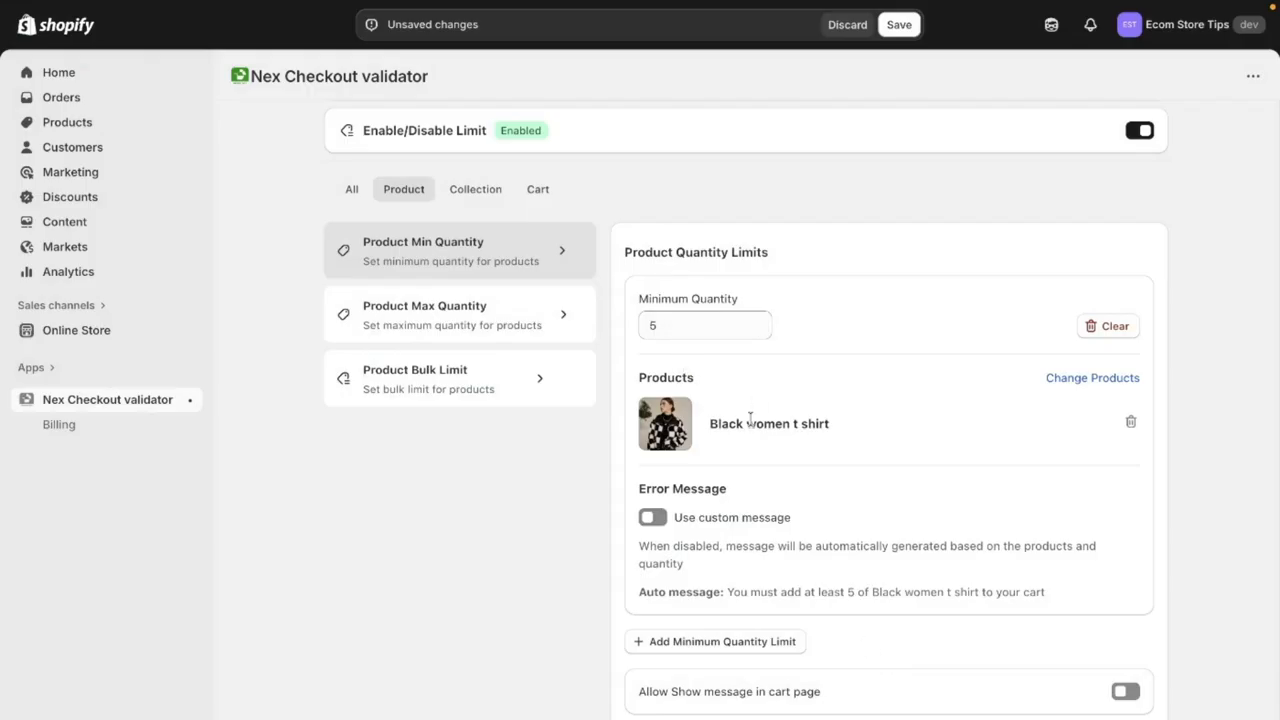
- 5
Write your error message — this is what customers see when they don’t meet the minimum. Make it clear and helpful: “You must add at least 5 of Black women t shirt to your cart.”
- 6
Save and activate — your rule is now live. It enforces on both the cart page and at checkout.
Tip: Start with one rule to test the flow. Add a minimum to a single product, visit your store as a customer, and try to check out with fewer items. You’ll see the validation in action.
Step 3: How checkout validation works
Unlike cart-only solutions (Liquid code, basic apps), Nex MOQ enforces minimums at the actual checkout step. Here’s what happens:
- 1
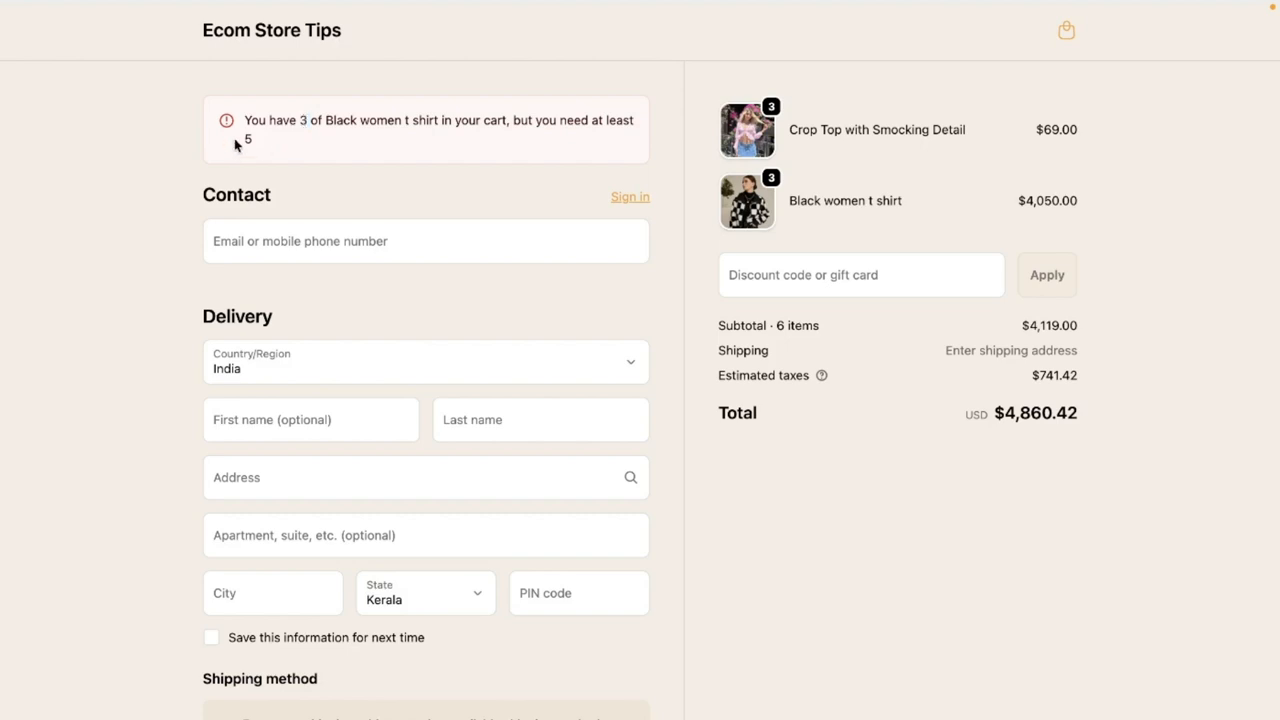
Cart page warning — when a customer’s cart doesn’t meet the minimum, a clear message appears on the cart page explaining what they need to add.

- 2
Checkout block — if a customer somehow reaches checkout without meeting the rule (direct URL, accelerated checkout), the payment button is blocked. They see your custom message and must go back to add more items.
- 3
Order completes — once the minimum is met, checkout proceeds normally. No friction for compliant orders.
Why checkout validation matters: Cart-page-only validation can be bypassed through direct checkout links, buy buttons, and Shop Pay. Checkout validation is the only way to truly enforce your rules.
Optional: Add conditions to your rules
You can make rules apply only to certain customers or situations:
- —Customer tags: Set “wholesale” tag minimums without affecting retail customers. Learn more about advanced rules →
- —Countries: Require higher minimums for international orders to cover shipping costs.
- —Always apply: Set store-wide minimums that apply to every customer and every order.
Summary
Setting up minimum quantity requirements on Shopify takes about 2 minutes with Nex MOQ. No code, no theme editing, and it works on every Shopify plan from Basic and up.
The key advantage over other methods is real checkout validation — your rules are enforced where it matters, not just as a suggestion on the cart page.
Related features
- Minimum Order Quantity — per-product quantity minimums
- Minimum Collection Quantity — minimums across entire collections
- Minimum Cart Quantity — store-wide cart minimums
- Checkout Validation — how rules are enforced at checkout
Further reading
- How to Set Minimum Order Quantity on Shopify — comprehensive written guide covering all methods
- Wholesale Minimum Orders — common use case for B2B stores
Nex MOQ Team
We build order limit tools for Shopify merchants. Our guides are written by Shopify experts who help thousands of stores manage minimum and maximum order rules.